Authentication
To begin using our mobile SDK and unlock its powerful features, you'll need to follow these three essential steps:
By completing these three steps, you will be ready to integrate and utilize our mobile SDK seamlessly within your applications. Our comprehensive documentation and support team are available to assist you throughout the integration process and help you make the most of our SDK's capabilities.
Access the SDK
Before you can access our SDK, you must get in touch with our sales team to discuss your licensing options and sign the necessary agreement. Our sales team will assist you in choosing the right licensing model that suits your needs and provide you with the details you need to proceed.
Contact Our Sales Team:
Before gaining access to the SDK, you are required to contact our sales team. They will assist you with the onboarding process, answer any questions you may have, and discuss licensing options.
You can schedule time with our sales team directly Talk to an ExpertEvaluation and Licensing:
After getting in touch with our sales team, you will have the opportunity to evaluate the SDK and discuss licensing terms based on your specific requirements. Our sales representatives will guide you through this process.
Access Granted:
Once you have completed the necessary steps with our sales team and agreed upon the terms, we will grant you access to the SDK. You will receive the credentials or access information required to start using the SDK in your development projects.
Documentation and Support:
You can refer to this documentation for detailed information on how to integrate and use the SDK. If you encounter any technical issues or have questions during the integration process, our support team will be available to assist you.
We understand that security, licensing, and support are essential aspects of using our SDK, and this process ensures that we can provide you with the best experience possible.
If you have any questions or need further assistance regarding access to the SDK, please do not hesitate to Contact our Sales Team. We look forward to working with you and helping you leverage the full potential of our SDK in your mobile applications.
Generate Access Credentials
Once you have completed the licensing process, you will be granted access to Veryfi Lens SDK. To install it in your development environment, you'll need to generate access credentials. These credentials will allow you to securely access and download the SDK.
Access credentials consist of a USERNAME and PASSWORD.
Follow these steps to generate your access credentials:
1. Navigate to the Keys Section:
2. Choose a Platform:
Within the Keys section, choose the Veryfi Lens platform that corresponds to your development environment.
3. Add Access Key:
Once you've selected the desired platform, locate and click the "Add Access Key" button.
4. Fill in required information:
You will be prompted to provide the following information:
- First and Last Name
- Email Address
- Create a Password
The password you create here will be used to access the SDK, and it won't be displayed in the Keys section again. Make sure to save it in a secure place.
5. Generated Username:
Upon providing the required information, your username will be generated.
6. Using Access Credentials:
You can now use these credentials to access the privately stored SDK.
When prompted for authentication, provide your USERNAME and PASSWORD.
Configure the SDK with Configuration Credentials
The API Key below can be a classic Standard API key or a newer client-scoped key (full-access or scoped, with an optional expiry). You configure the SDK the same way for both — you always provide your USERNAME, CLIENT ID, API KEY, and ENVIRONMENT URL. The only difference is how you create the key (and the SDK version required). See Using a client-scoped API key below.
With the SDK installed, the next step is to configure it with the necessary credentials. These configuration credentials are vital for initializing and consuming the SDK's functionality within your mobile applications.
These credentials include:
Ensure that you keep these credentials secure and do not expose or store them in your application's source code or public repositories.
Here's how to generate them:
1. Navigate to the Keys Section:
2. Access Your Configuration Credentials:
Your configuration credentials are typically displayed in this section and consist of:
- Client ID: This is a unique identifier for your application.
- Username: Your username or account name associated with the SDK.
- API Key: An API key for authenticating your application with the SDK.
- Environment URL: The URL or endpoint that your application needs to communicate with the SDK
You can copy and securely store these credentials as they will be required during the configuration and initialization of your application.
3. Integrate Credentials Into Your Application:
Use the obtained configuration credentials in your application's code to configure and initialize the SDK
4.Additional Considerations:
- Ensure that you keep these credentials secure and do not expose or store them in your application's source code or publicly accessible locations.
- Double-check that you are using the correct credentials for your development or production environment, depending on your application's stage.
By following these steps, you will successfully obtain the necessary configuration credentials for your application. These credentials are crucial for setting up and customizing the SDK to work seamlessly with your specific use case and environment. If you encounter any issues or have questions about using these credentials, refer to your SDK's documentation or contact the SDK provider for further assistance.
Using a client-scoped API key
The API Key you configure the SDK with can be either kind of Veryfi API key:
- A Standard API key — the classic per-user key.
- A client-scoped key — a Bearer key that belongs to your account rather than an individual user. It comes in full-access and scoped variants, can be restricted to only the routes Lens needs, and can be rotated, revoked, or given an optional expiry independently of your user credentials.
You configure and initialize the SDK exactly the same way for either kind of key — you always provide your CLIENT ID, USERNAME, API KEY, and ENVIRONMENT URL. The only differences are how you create the key (below) and the minimum SDK version required for client-scoped keys.
Client-scoped keys are supported from:
- Android
2.6.0.13or newer - iOS
v3.0.11.5or newer - React Native / Flutter / Capacitor / .NET (Xamarin & MAUI)
v2.0.58or newer - Cordova
v2.6.58or newer
On earlier versions, use a Standard API key.
1. Create the key
For a scoped key with just the routes Lens needs:
- Sign in and open the Keys section.
- Under Bearer - Scoped API Keys, click Create scoped key (or Edit an existing one).
- In the Presets row, select Lens SDK. This automatically grants exactly the routes the Lens SDK needs — you don't have to pick individual routes. You can also set an optional expiry under Advanced.
- Save the key and copy its value (it starts with
vrfk_). Store it as securely as your other credentials.
(A Bearer - Full Access key works too, and a Standard API key works on any SDK version.) See Bearer API key management for the full walkthrough.
If you don't see the Lens SDK preset, your account may not have Lens enabled yet — contact your Veryfi representative.
2. Configure the SDK with the key
Configure the SDK just like the steps above: provide your CLIENT ID, USERNAME, API KEY, and ENVIRONMENT URL. The only change is that the API Key is your client-scoped key (it starts with vrfk_). Keep providing your USERNAME — Lens still needs it for non-authentication purposes — and Lens detects the key type automatically. Everything else in the SDK initialization steps stays the same.
Store Veryfi Lens Credentials securely
This process safeguards Veryfi credentials through the following measures:
Protection from Reverse Engineering Attacks: By not storing the credentials as part of the app's source code, the possibility of obtaining them via reverse engineering, with tools like Apktool, is eradicated.
Defence from Man-in-the-Middle Attacks: Here, only the Public Key is dispatched to the API for encrypting Veryfi credentials, making them inaccessible even if an attacker launches a Man-in-the-Middle, Proxy, or SSL attack. This is because the encrypted credentials necessitate the Private Key for decryption - a key that only the app that generated it can access.
Shielding from Other Attacks: Thanks to protection mechanisms provided by the device's OS, the Key Pair employed for encryption/decryption of Veryfi credentials is immune to attacks. This Key Pair is produced upon app installation and stored in Android Keystore or iOS Keychain.
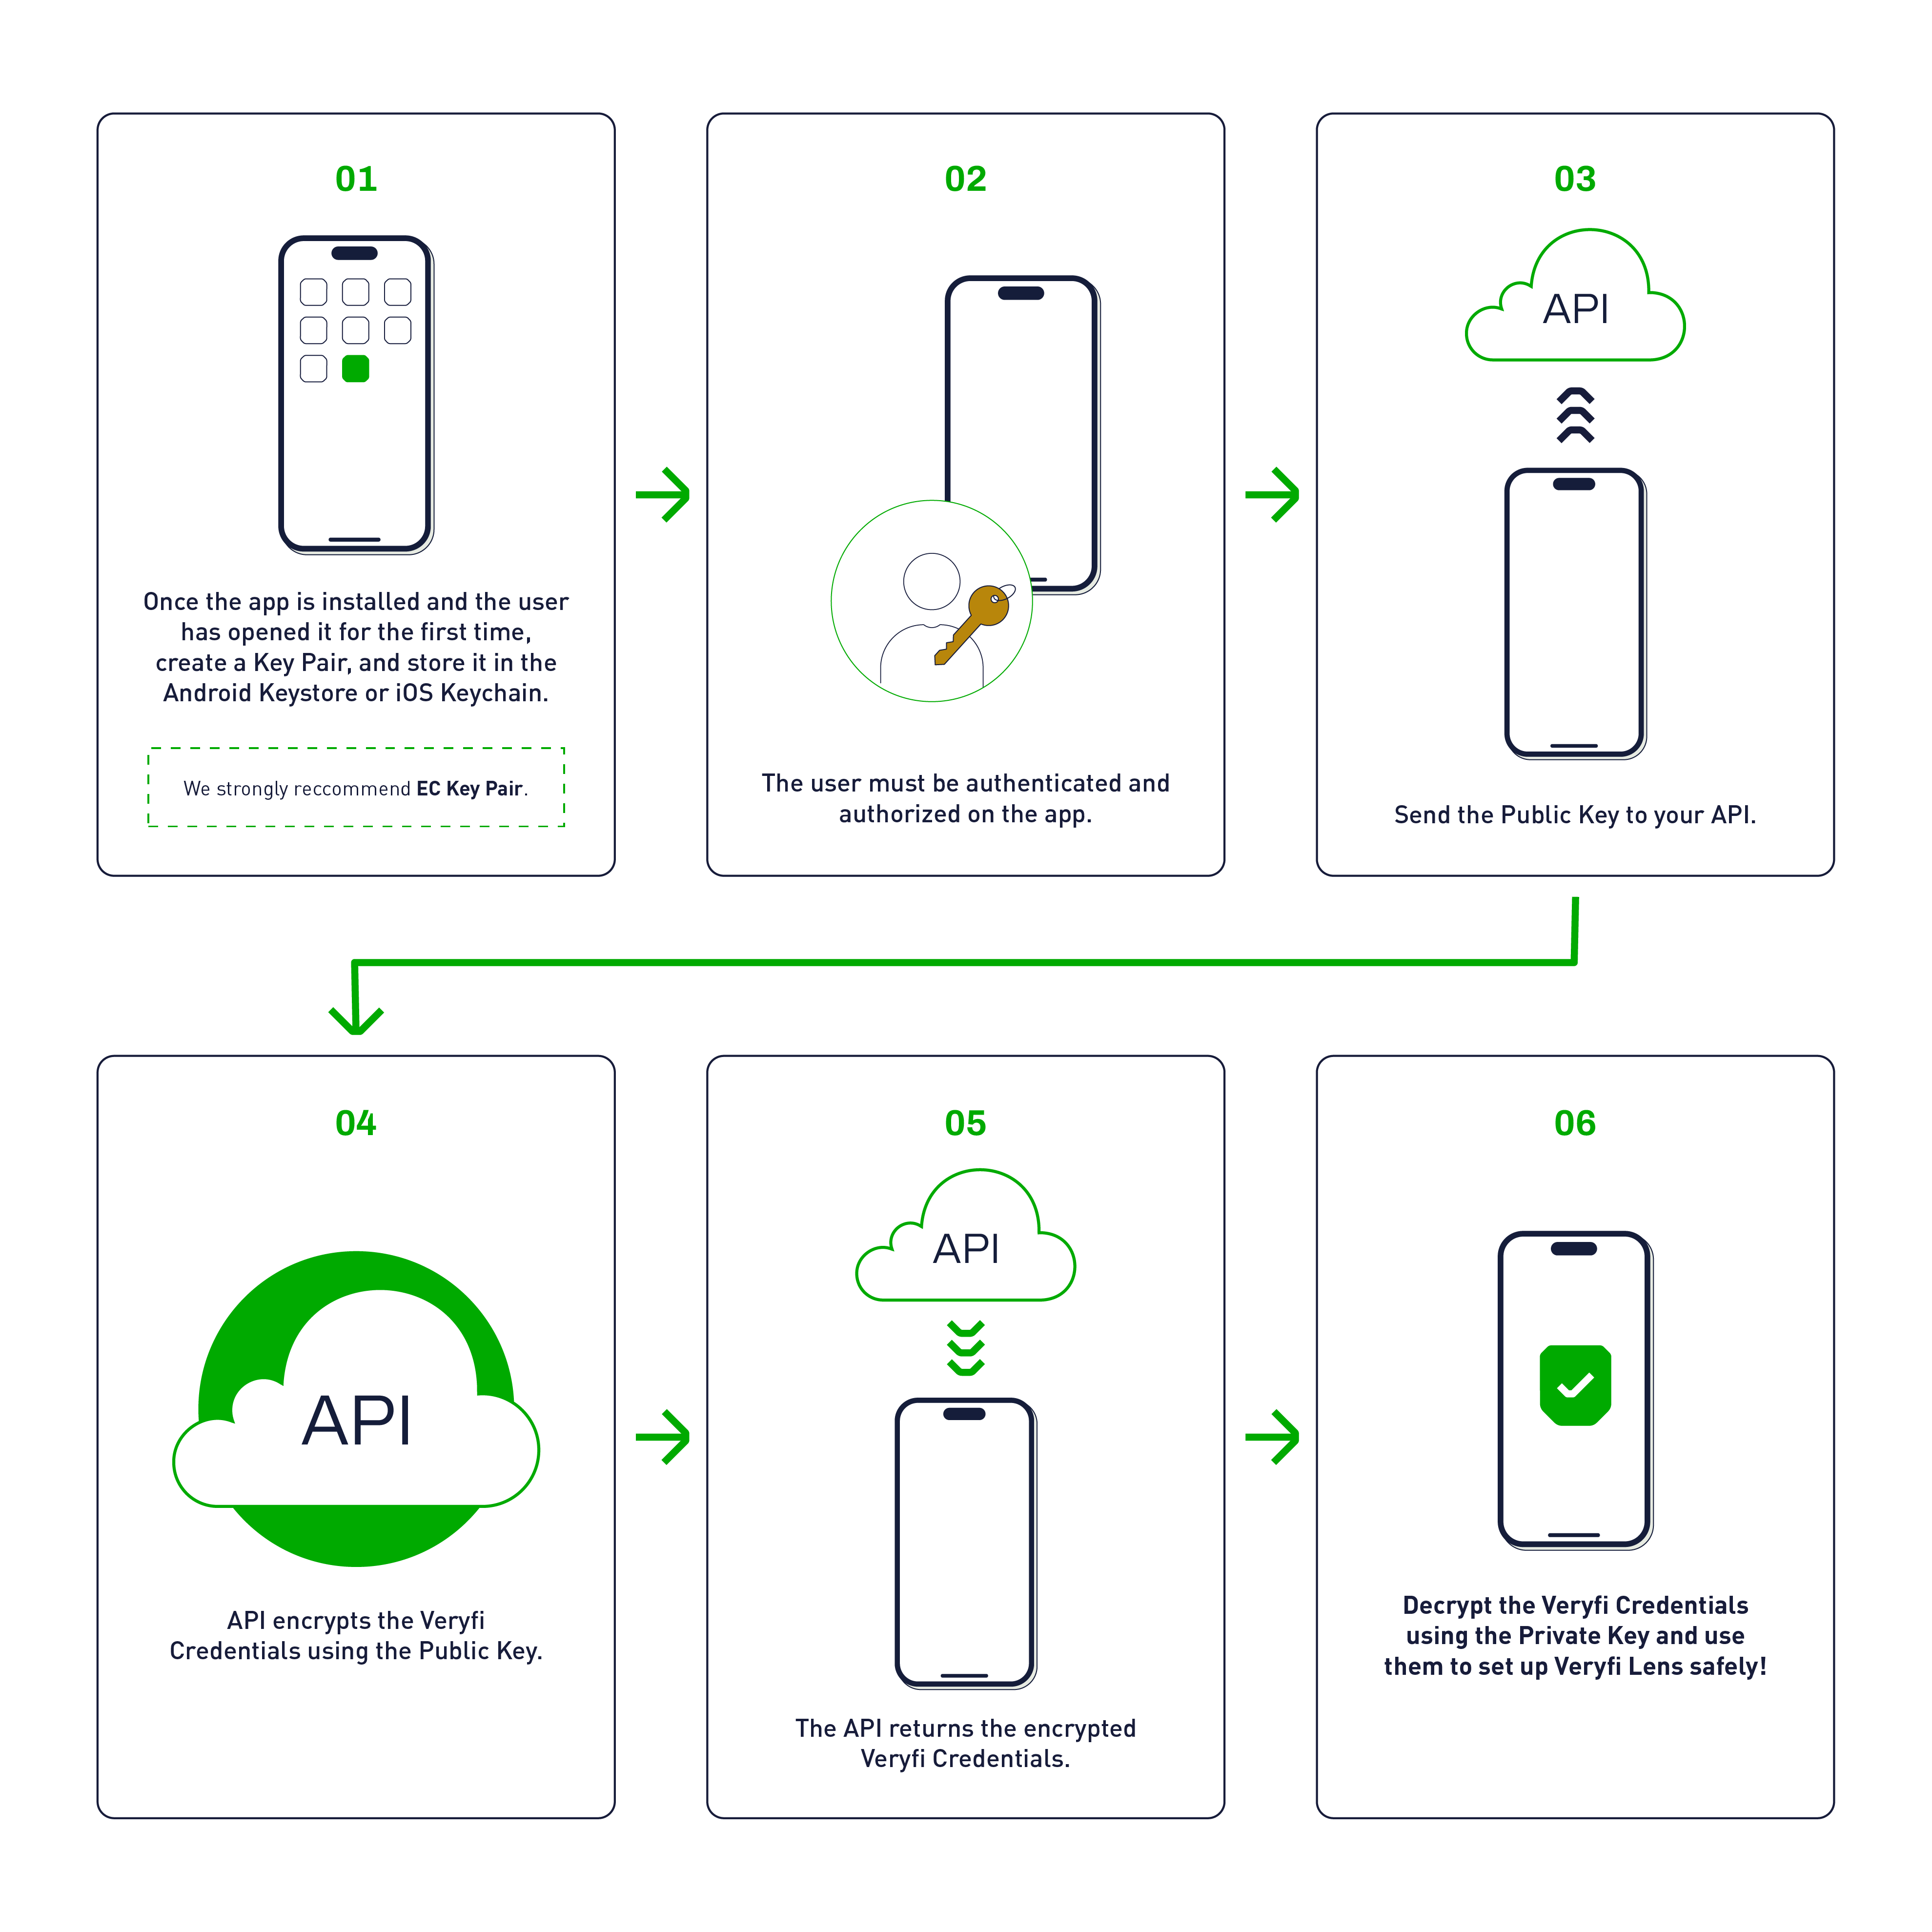
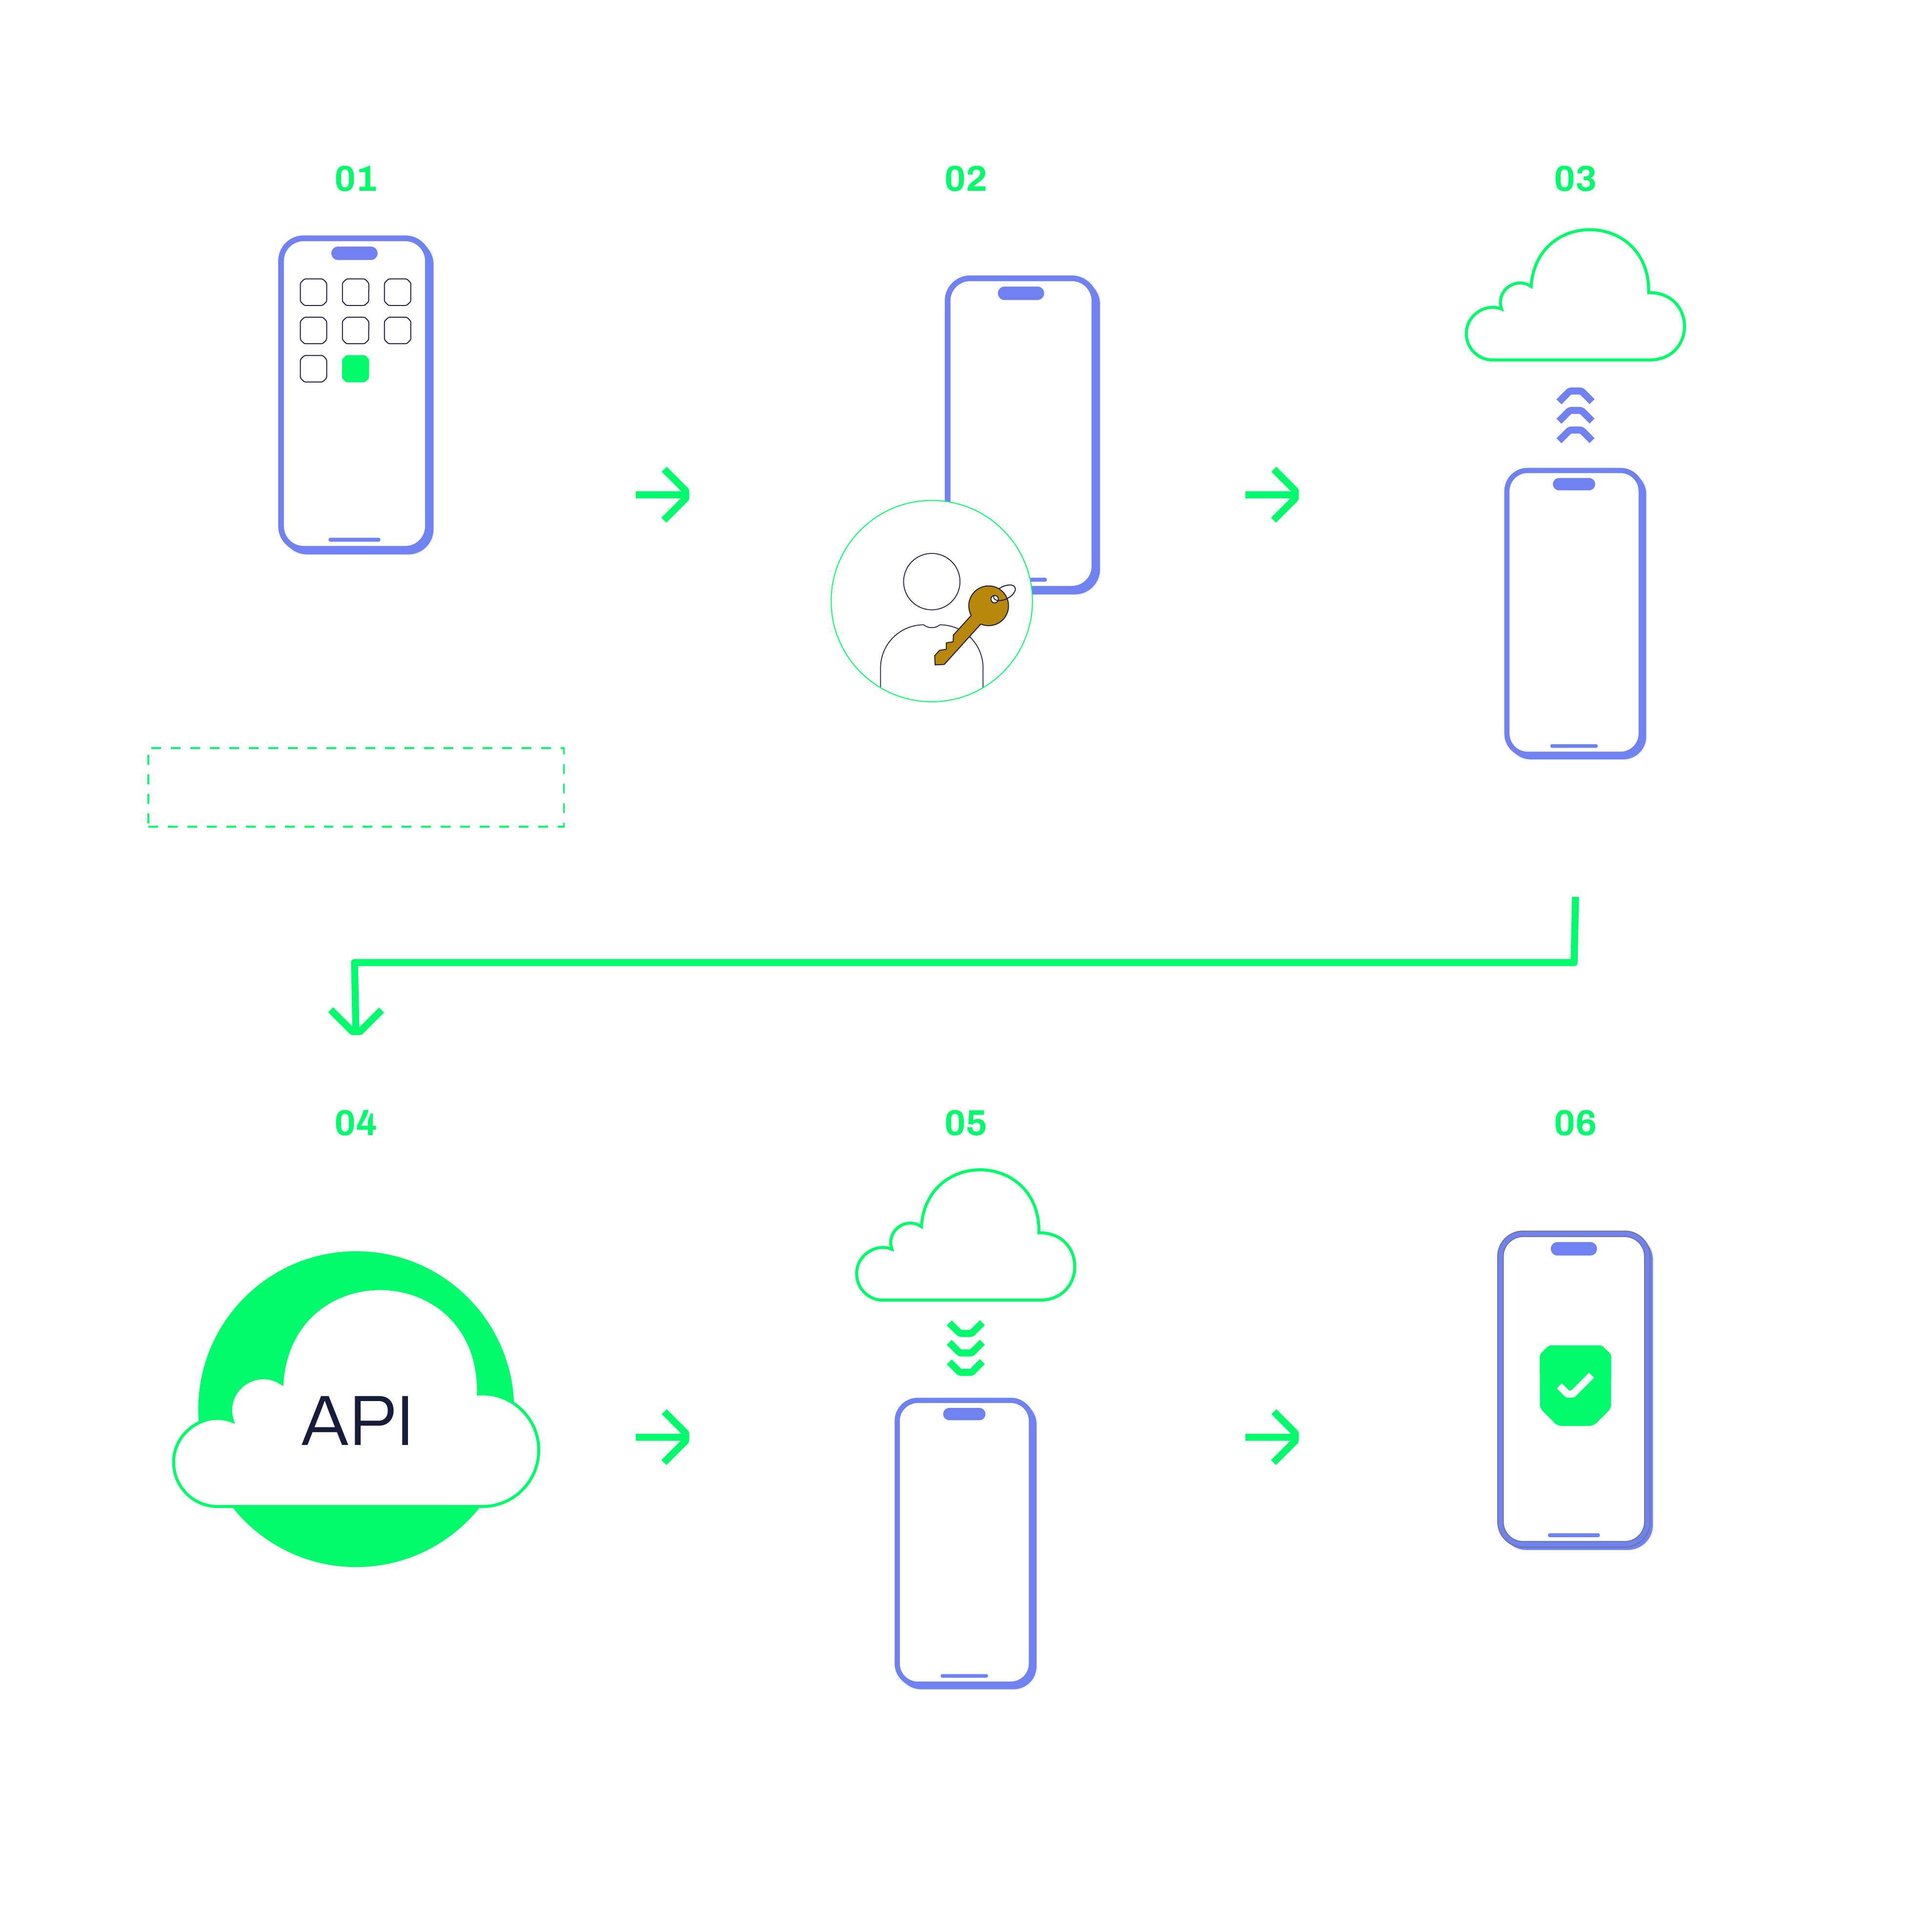
Following decryption within the app, the credentials can be safely stored on the device, eliminating the requirement to retrieve the Veryfi credentials after every user login. For Android, this should be carried out using EncryptedSharedPreferences, and for iOS, Keychain should be utilized.
If plausible, extend the security measures to include SSL pinning in iOS apps to strengthen defense against man-in-the-middle attacks. Before execution, ascertain its suitability for your app as incorrect implementation may render the app ineffective. Bear in mind, SSL pinning demands the implementation of fallback strategies to accommodate future changes in the SSL certificate.